


روابط سريعة
منتجات
جهات الاتصال
حقوق الطبع والنشر © 2025 Jining Xunda Pipeline Anti-corrosion Materials Co., Ltd. جميع الحقوق محفوظة. مدعوم من Easybiz


Water intrusion around roofs, windows, doors, wall panels, and penetrations rarely starts as a dramatic failure. It often begins at a small joint where wind-driven rain, movement, dust, or surface contamination has weakened the seal. For contractors, distributors, maintenance teams, and purchasing managers, choosing the right flashing tape is not just about buying an adhesive roll. It is about matching the backing, adhesive, surface preparation, installation sequence, and inspection method to the real conditions on site.
This guide explains how to evaluate flashing tape for roof and window sealing projects without relying on guesswork. It covers where the material works best, what to check before ordering, how to prepare difficult substrates, and how to avoid the installation mistakes that often cause callbacks. The goal is practical: help you specify flashing tape that supports durable waterproofing while keeping installation straightforward for field crews.
Flashing tape is a pressure-sensitive sealing material used to bridge joints, laps, openings, and transitions where water may enter an assembly. In building work, it is commonly applied around window flanges, door frames, roof edges, skylights, façade panels, metal seams, pipe penetrations, and repair areas. In industrial maintenance, flashing tape can also help seal temporary enclosures, equipment housings, sheet-metal overlaps, and exterior joints that need fast weather protection.
The search intent behind flashing tape is usually specific. A buyer is often trying to prevent leaks around an opening, compare material types, or understand why one tape bonds better than another on concrete, metal, timber, plastic, or coated surfaces. A useful answer therefore needs to go beyond a product description. It should explain how the seal works and what can make it fail.
Traditional flashing uses metal, membranes, or formed components to redirect water away from vulnerable areas. Flashing tape supports the same principle in a flexible roll format. It does not replace correct drainage design, proper slope, or mechanical detailing, but it can create a continuous waterproof layer across joints that would otherwise be difficult to seal cleanly.
Flashing tape is most useful at transitions. These are the places where one material meets another and the assembly must tolerate movement, temperature changes, and exposure. A roof-to-wall junction, a window frame set into a wall opening, a metal panel lap, or a pipe passing through a wall all create edges where water can collect. If the tape cannot remain bonded at those edges, the apparent seal becomes a hidden leak path.
For window and door work, flashing tape is often used on the sill first, then on the sides, and finally across the head so upper layers shed water over lower layers. That shingle-style logic matters. Even a high-quality flashing tape can be defeated when laps are reversed, because water is invited behind the seal instead of being guided outward.
For roofing and sheet-metal work, flashing tape is commonly chosen for seams, edge details, localized repairs, gutter interfaces, and penetrations. The tape should be compatible with the roof surface and should not be asked to compensate for standing water, unstable coatings, loose rust, or structural movement beyond its design. On industrial buildings, installers should also consider heat, ultraviolet exposure, vibration, and maintenance access.
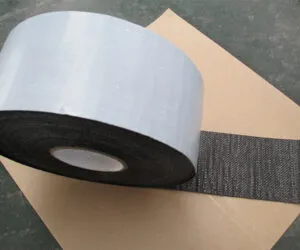
A roll of flashing tape may look simple, but its performance depends on three major parts. The backing provides strength, weather resistance, and handling characteristics. The adhesive creates contact with the substrate and fills small surface irregularities. The release liner protects the adhesive until application and affects how easily the tape can be positioned on site.
Butyl-based adhesive is widely used in waterproof sealing because it offers strong tack, flexibility, and resistance to moisture. A butyl flashing tape can conform around corners and uneven surfaces more easily than a rigid flashing component. Aluminum foil, polymer film, or other reinforced backings may be selected when the exposed face needs better weather resistance, dimensional stability, or tear resistance.
The correct backing depends on exposure. A concealed flashing tape behind cladding may need different properties from a tape exposed on a metal roof. A visible exterior repair benefits from a stable facing that resists weathering, while a tape behind a window flange may prioritize conformability and reliable bonding to the rough opening.
| Project condition | What to check | Why it matters |
|---|---|---|
| Window and door openings | Conformability, lap sequence, bond to sheathing | Prevents water from tracking behind frames |
| Metal roof seams | Backing durability, heat resistance, surface cleanliness | Supports long-term adhesion on exposed metal |
| Concrete or masonry edges | Primer need, dust control, surface dryness | Porous surfaces can weaken adhesive contact |
| Pipe or duct penetrations | Flexibility, overlap width, movement allowance | Round details need careful forming and pressure |
| Temporary repairs | Speed, weather tolerance, inspection access | Fast sealing still requires clean application |
Substrate compatibility is one of the most important checks before choosing flashing tape. Metal, glass, concrete, masonry, timber, plastic, and coated panels have different surface energy, texture, and contamination risks. A tape that bonds firmly to smooth galvanized metal may behave differently on dusty cement board or weathered paint.
On clean metal, flashing tape usually needs firm pressure to wet out the surface and remove trapped air. On porous surfaces, the installer may need a compatible primer or surface conditioner, especially if the substrate is powdery. On plastic materials, compatibility should be confirmed because some plasticizers, coatings, or low-energy surfaces can reduce adhesion. On treated timber, moisture content and chemical treatment can also affect bond quality.
Surface preparation should never be treated as a minor step. Remove dust, loose coatings, oil, release agents, standing water, and sharp debris. If the surface is cold, damp, or heavily textured, test a small area before committing to full installation. A field peel check after rolling the tape can reveal whether the flashing tape is actually bonding or merely sitting on the surface.
Width determines how much bearing surface the flashing tape has on each side of the joint. A narrow strip may seem economical, but it leaves little margin for irregular cuts, movement, or uneven framing. Around windows and doors, the selected width should allow proper coverage on the frame or flange and enough contact on the wall substrate to create a stable seal.
Thickness affects conformability and build-up. A thicker flashing tape may fill minor surface irregularities and resist puncture better, but it can also create raised edges under thin finishes. A thinner tape may be easier to lap under cladding or trim, but it must still have enough adhesive mass to wet out the substrate. The best choice balances sealing performance with the geometry of the assembly.
For roof and panel repairs, consider the actual joint shape. If the joint has a wide gap, unstable edge, or recurring movement, flashing tape alone may not be enough. The joint may need backing, mechanical repair, or a designed expansion detail. Tape performs best when it is used as part of a sound assembly, not as a patch over unresolved movement or damage.
Temperature affects both installation and service life. In cold weather, adhesive flow is slower, so flashing tape may need more pressure, more dwell time, or a compatible primer. In hot climates, the backing and adhesive should resist softening, creep, and edge lifting. For exposed applications, ultraviolet resistance and weathering of the facing are especially important.
Moisture is another key variable. Some emergency repairs are performed in less-than-ideal conditions, but durable sealing is easier when surfaces are dry and clean. If the project involves rain exposure, condensation, or high humidity, confirm whether the selected flashing tape is suitable for the timing and environment. A tape installed over trapped moisture may appear sealed at first and later develop blisters, poor adhesion, or staining.
Building science resources such as the U.S. Department of Energy guidance on air sealing reinforce the importance of controlling leakage paths in the building envelope. Waterproofing and air sealing are not identical tasks, but both depend on continuity. Flashing tape should be selected and installed so the barrier remains continuous at corners, seams, and transitions.
Good installation begins before the liner is removed. Measure the joint, plan the lap direction, and pre-cut pieces where accuracy matters. Dry-fit the flashing tape around the opening or seam so the crew understands the sequence. On vertical openings, start with the sill or lower area, then move upward. This sequencing helps water drain over each layer instead of behind it.
When applying flashing tape, peel the liner gradually and avoid touching the adhesive with dusty gloves. Align one edge first, then press from the center outward to reduce wrinkles and trapped air. Use a roller where possible, especially on metal, smooth panels, and window flanges. Hand pressure alone often leaves small channels that become water paths under wind-driven rain.
Corners deserve extra care. Do not stretch flashing tape aggressively around tight corners unless the product is designed for that movement. Stretching can create recovery forces that later pull the tape away from the surface. At inside corners, form the tape slowly, use relief cuts only when compatible with the waterproofing design, and cover cuts with proper overlaps.
After application, inspect edges, laps, and terminations. Look for fishmouths, wrinkles, debris under the tape, and areas that did not receive enough pressure. A simple visual inspection catches many problems before cladding, trim, or roofing components hide the detail. For critical work, document the installation conditions and keep sample pieces or product labels for quality records.
The first common mistake is applying flashing tape over contamination. Dust, oil, chalked paint, rust flakes, and wet cement residue all interrupt adhesive contact. The second mistake is using too little pressure. Pressure-sensitive tape needs pressure to develop intimate contact with the surface. Without that contact, even a strong adhesive cannot perform as intended.
The third mistake is reversing laps. Water should always meet an upper layer that sheds over a lower layer. If a lower piece is placed on top of an upper piece, water can be driven into the lap. This is especially important around window heads, sill pans, roof edges, and wall penetrations.
The fourth mistake is ignoring movement. Buildings and industrial structures move with temperature, vibration, settlement, and normal service loads. Flashing tape can tolerate some movement, but it should not be used to hold unstable components together. Repair loose panels, fasteners, cracks, and damaged substrates before relying on tape for waterproofing.
The fifth mistake is treating all tapes as interchangeable. A packaging tape, duct tape, or general-purpose repair tape is not the same as flashing tape designed for waterproof envelope details. Buyers should review adhesive type, backing material, service temperature, exposure rating, roll dimensions, and installation instructions before approving a substitution.
Procurement teams should ask practical questions before ordering flashing tape in volume. What substrates will the customer use it on? Will it be exposed or concealed? What temperature range is expected during installation and service? Is the project new construction, maintenance, or emergency repair? The answers determine whether the product must prioritize conformability, exposed durability, heat resistance, or fast application.
Documentation also matters. Ask for product data sheets, storage guidance, shelf-life information, and installation instructions. For projects with formal specifications, refer to recognized standards organizations such as ASTM International when test methods or material requirements are specified by the designer. Do not assume a logo or general claim proves suitability for a specific project; check the actual standard, scope, and test condition when compliance is required.
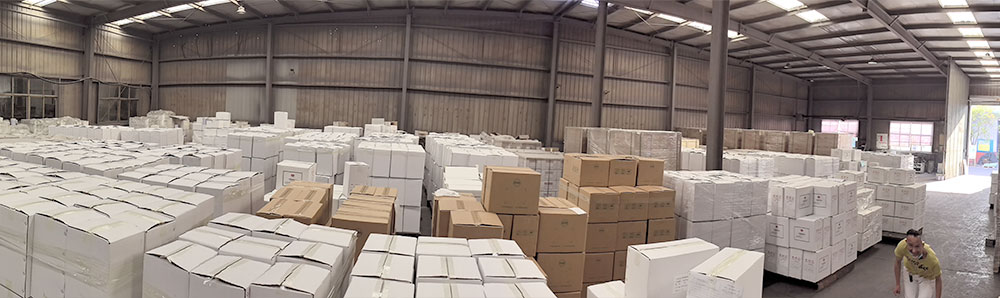
Storage and handling can affect field performance. Keep flashing tape in clean packaging, away from excessive heat, dust, and direct weather before installation. Rotate inventory so older rolls are used first. If a roll has damaged edges, contaminated adhesive, crushed cores, or a liner that releases poorly, set it aside and investigate before sending it to a jobsite.
| Buyer question | Good specification detail | Risk if ignored |
|---|---|---|
| Where will the tape be installed? | Roof seam, window opening, door frame, wall panel, or penetration | Wrong backing or adhesive selection |
| What is the substrate? | Metal, concrete, masonry, timber, plastic, or coated surface | Poor adhesion or edge lift |
| Will it be exposed? | Exposed weathering or concealed behind cladding | Premature surface degradation |
| What is the installation climate? | Cold, hot, humid, dusty, or indoor-controlled | Slow tack, blistering, or contamination |
| What inspection is required? | Roller pressure, lap direction, edge check, photo record | Hidden defects after close-up |
In roof systems, flashing tape should support the drainage path. It can seal laps and localized details, but it should not create dams where water collects. Before application, check slope, fastener condition, coating stability, and the path water will follow after the repair. If water can pond against an exposed edge, consider whether additional mechanical detailing or coating protection is needed.
In window systems, flashing tape should integrate with the weather-resistive barrier, sill detail, side jambs, head flashing, and exterior cladding. The tape must be placed so water can escape. Sealing every edge without thinking about drainage can trap moisture inside the wall. A durable installation manages water by both blocking entry and giving incidental moisture a safe path outward.
For prefabricated panels and modular construction, flashing tape can help standardize sealing details across repeated openings. The benefit is consistency. Crews can follow the same sequence, use the same roller pressure, and inspect the same lap widths. This repeatability is valuable for distributors and contractors who need a material that performs reliably across many similar units.
Primer is not always required, but it can be valuable on dusty, porous, cold, or difficult surfaces. The primer must be compatible with the flashing tape and substrate. Applying an unrelated primer or solvent can create new adhesion problems. Follow the tape supplier's guidance on drying time, coverage, and safe handling.
Additional sealant may be useful at terminations, sharp transitions, fastener heads, or irregular penetrations. However, sealant should not be used to hide poor tape contact. If the flashing tape has wrinkles, open edges, or contaminated adhesive, fix the tape installation first. Sealant is a detailing aid, not a substitute for correct bond pressure and lap design.
For critical exterior work, a small mock-up is often the most efficient quality check. Apply flashing tape to the actual substrate, use the planned surface preparation method, roll it with normal field pressure, and inspect the bond after a suitable dwell period. A mock-up can reveal compatibility issues before the project depends on hundreds of meters of installed material.
Even a well-installed flashing tape should be inspected as part of normal building maintenance. Exposed roof repairs should be checked after severe weather, high heat, or nearby construction activity. Look for lifted edges, punctures, impact damage, coating failure, or movement in the underlying panel. Early correction is usually easier than waiting until water reaches insulation, framing, or interior finishes.
For concealed window and wall applications, maintenance is less direct, so the installation record becomes more important. Photos of lap direction, sill treatment, corner details, and roller application can help confirm the work was completed correctly before it was covered. This is especially useful for large projects with many identical openings.
Distributors can support customers by providing concise installation checklists with each flashing tape order. A checklist helps field crews remember surface cleaning, lap direction, pressure rolling, corner treatment, and final inspection. It also reduces the chance that a material complaint is actually an installation problem that could have been prevented.
Before approving flashing tape for a roof, window, door, or panel project, confirm the intended use, substrate, exposure, width, thickness, backing type, adhesive type, installation temperature, and inspection method. Ask whether the tape will be concealed or exposed, whether the surface needs primer, and whether the project detail allows water to drain correctly.
The right flashing tape should be easy for trained crews to apply, forgiving enough for real jobsite conditions, and strong enough to maintain a waterproof seal at vulnerable transitions. The best results come from combining suitable material selection with disciplined installation: clean the surface, follow the correct lap sequence, apply firm pressure, inspect the edges, and document critical details before they are covered.
For buyers comparing options, the most reliable approach is to define the sealing problem first and then select flashing tape around that problem. A roof seam, a window sill, a metal lap, and a pipe penetration may all need waterproofing, but they do not impose the same demands on the tape. Matching the product to the actual detail is what turns a simple roll of adhesive material into a dependable waterproofing solution.